
Weekly Tip #27
How to Redact Sensitive Content in a PDF
Hide sensitive data in PDFs permanently with Foxit PDF Editor's Redaction feature, ensuring your privacy when sharing files.
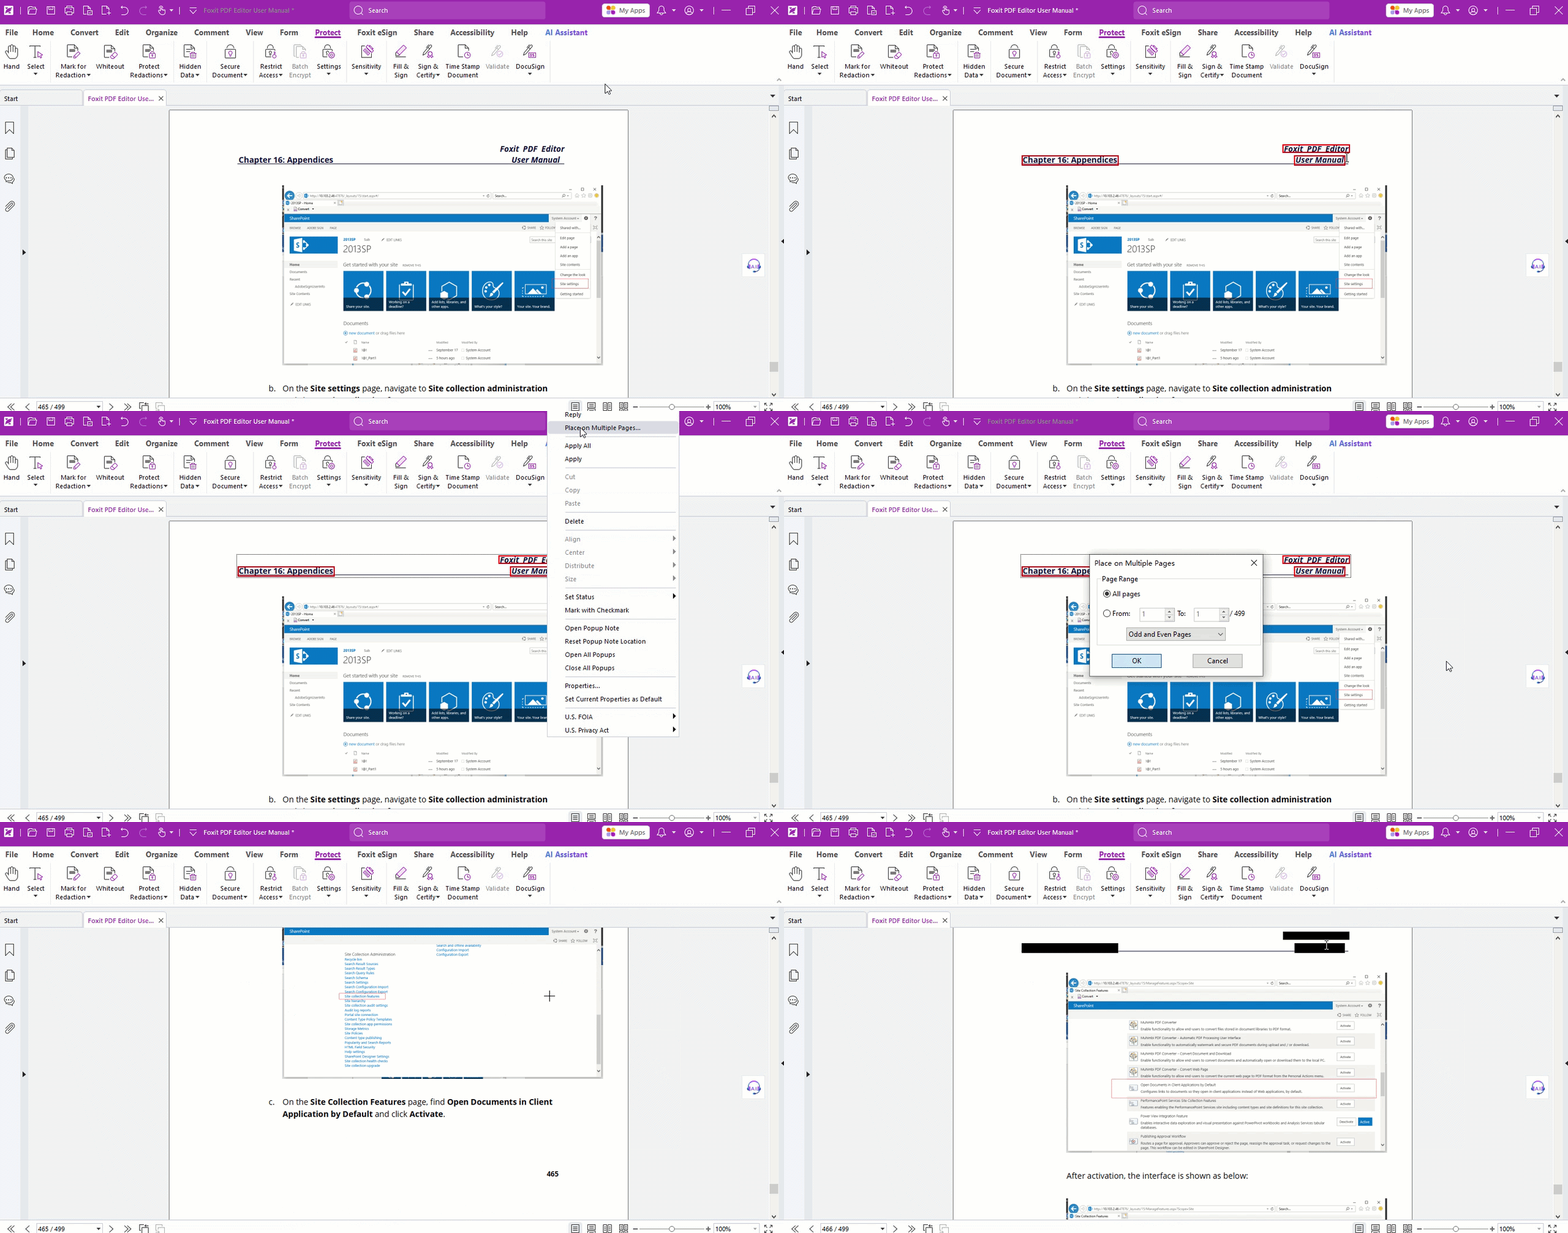
We all know videos and images can be blurred or pixelated — but what about PDFs? Whether you're sharing a paper, lecture notes, or confidential records, Foxit PDF Editor's Redaction feature lets you permanently conceal or delete sensitive content, so you can share the file while protecting your privacy and intellectual property.
Let's walk through it!
Part 1: Mark Text or Images for Redaction
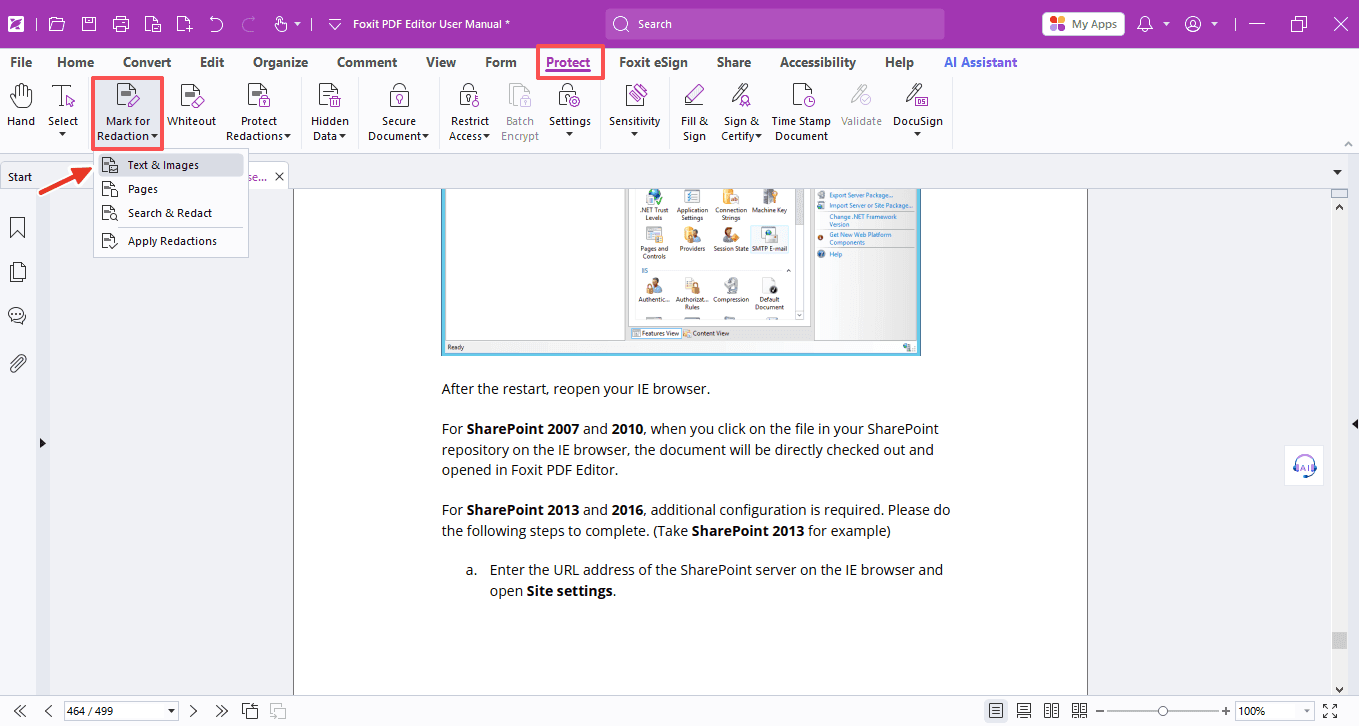
- Select Protect > Mark for Redaction > Text & Images.
- Drag a rectangle over the area you want to redact. This lets you mark text and graphics at the same time.
Note: When you move your pointer over a marked area, the selected content or page fills with black — text and images are covered. That’s what redaction looks like before you apply it.
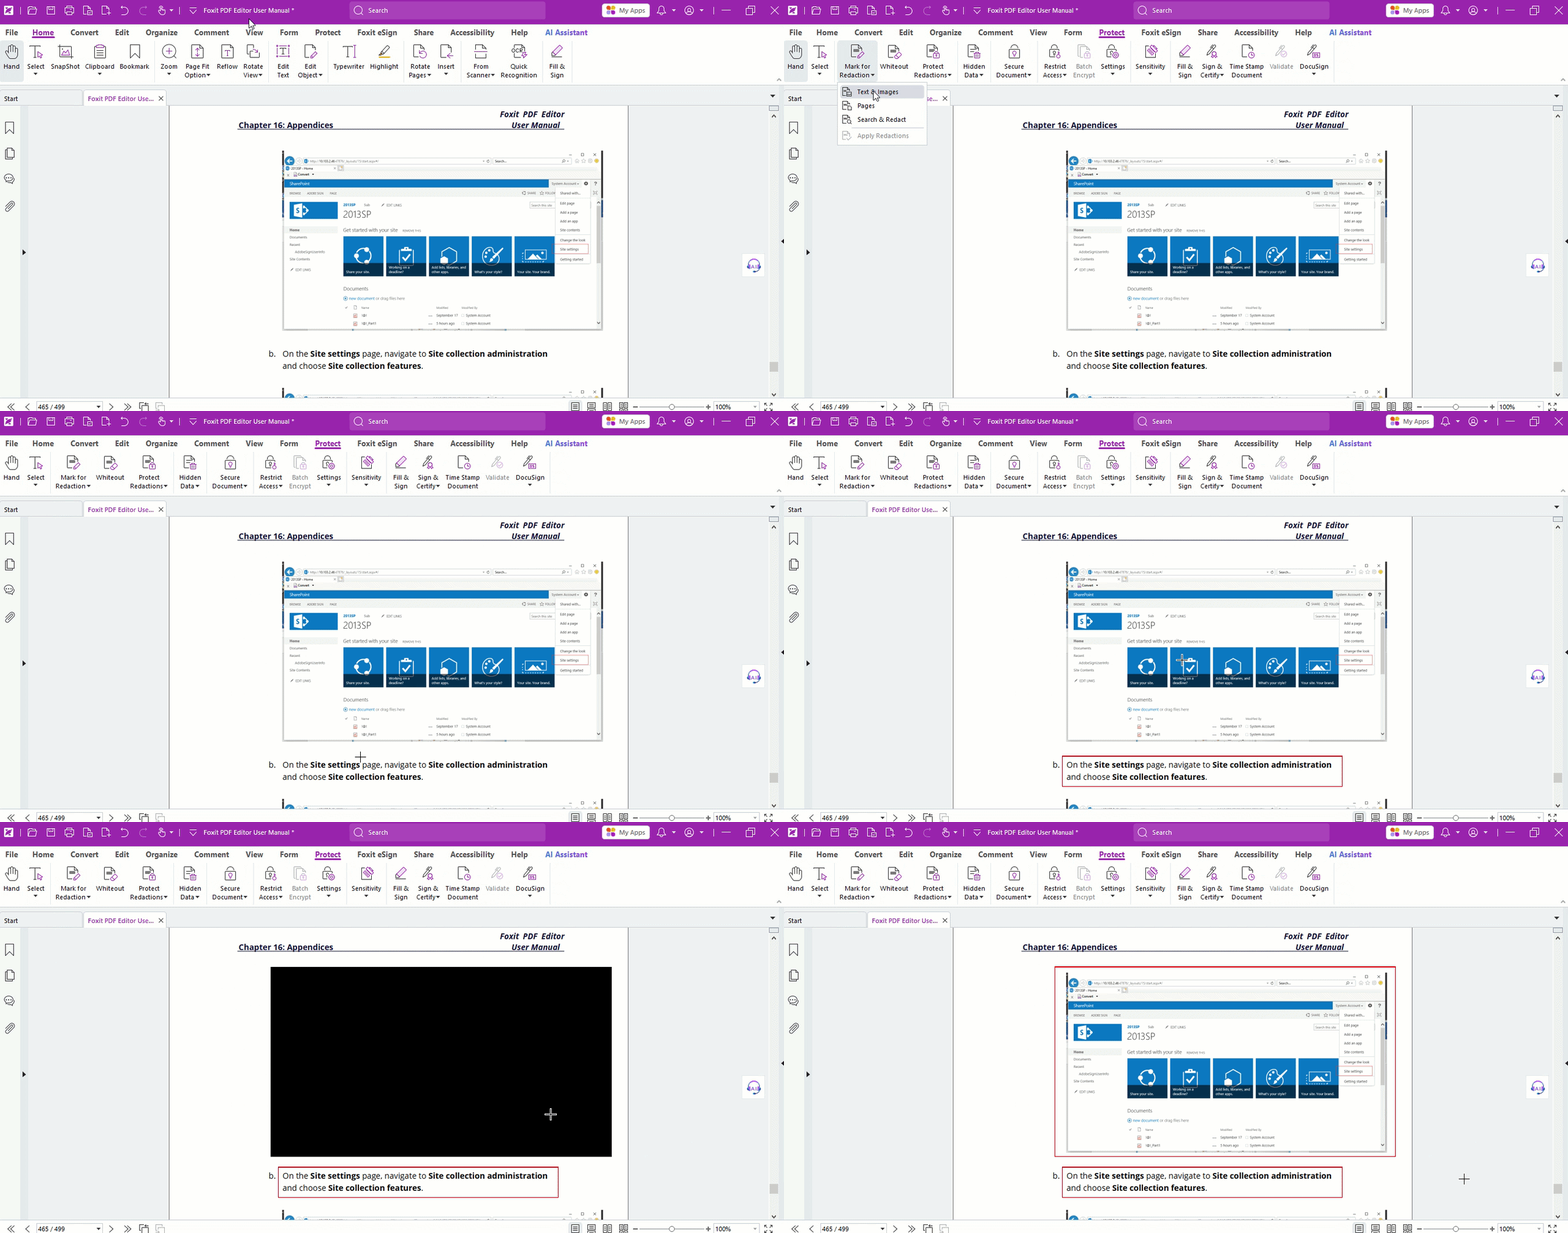
- Alternatively, hover your pointer over the text, click and drag to select what you want to mark.
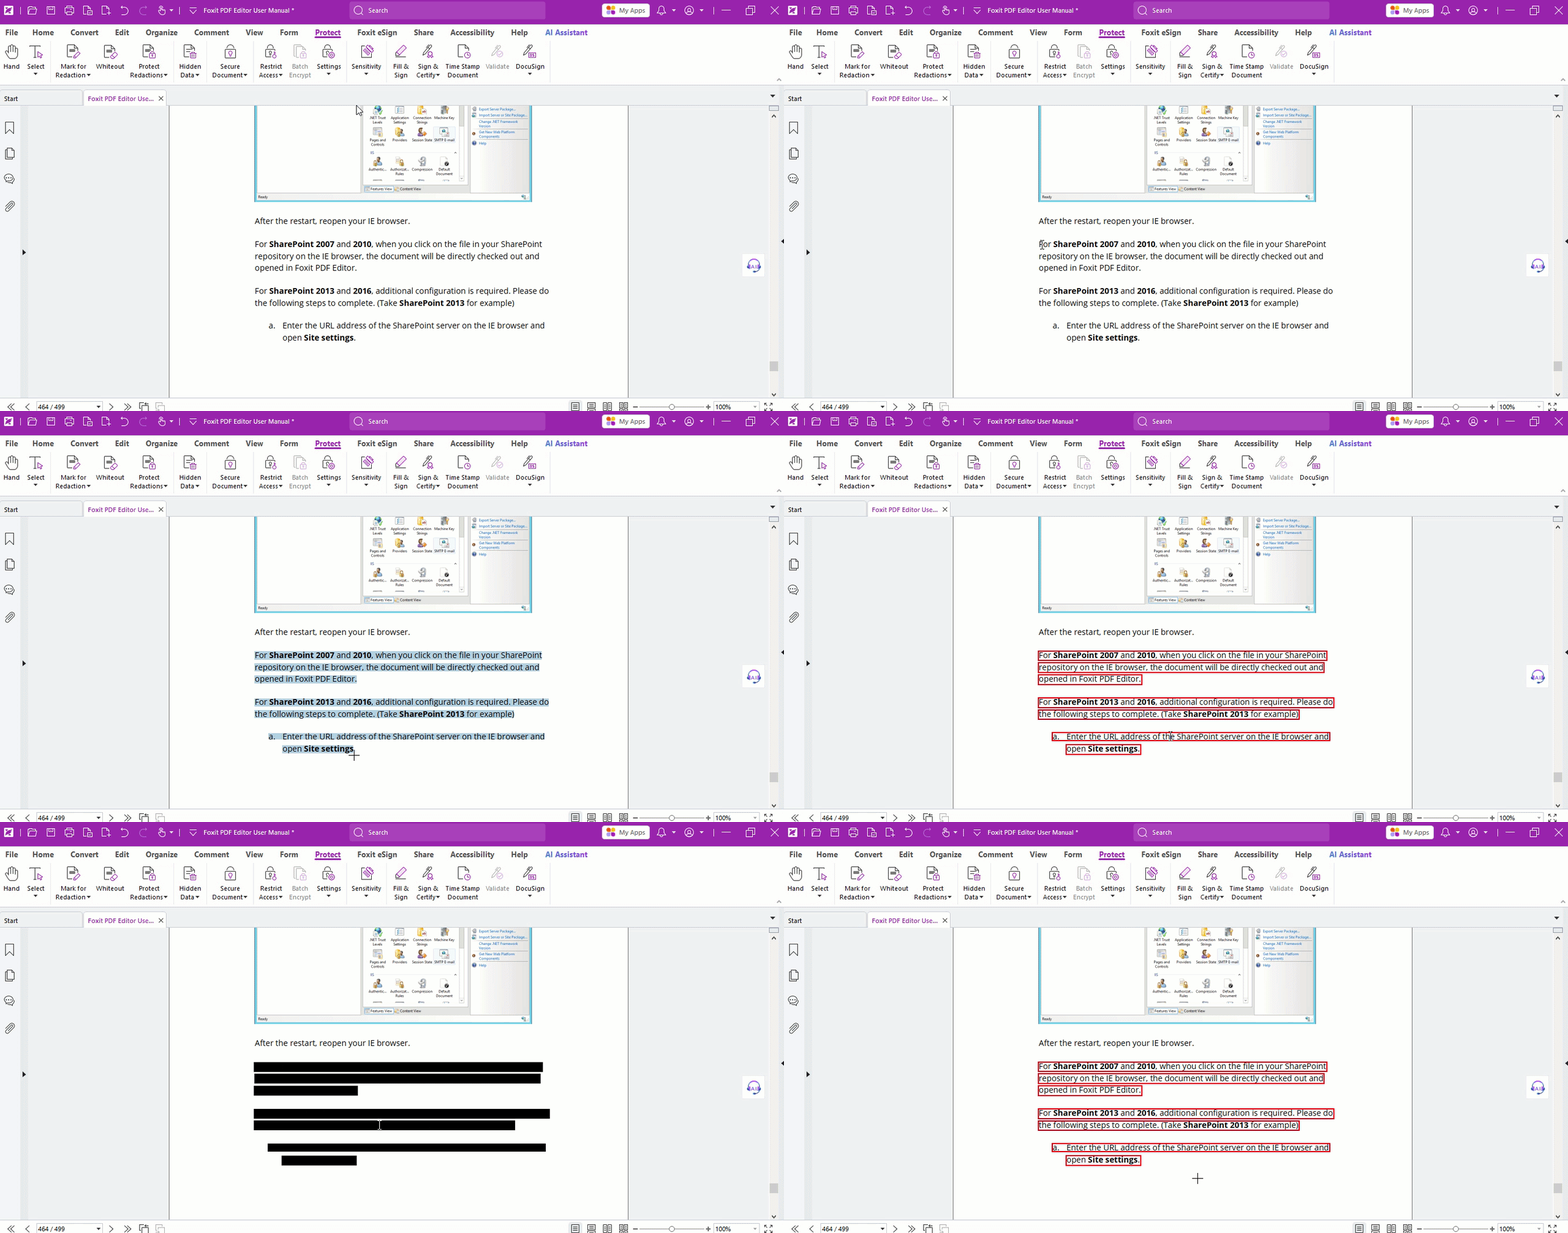
Need to redact the same spot on multiple pages? Right-click the marked content and choose Place on Multiple Pages…
Want to redact entire pages?
- Select Protect > Mark for Redaction > Pages
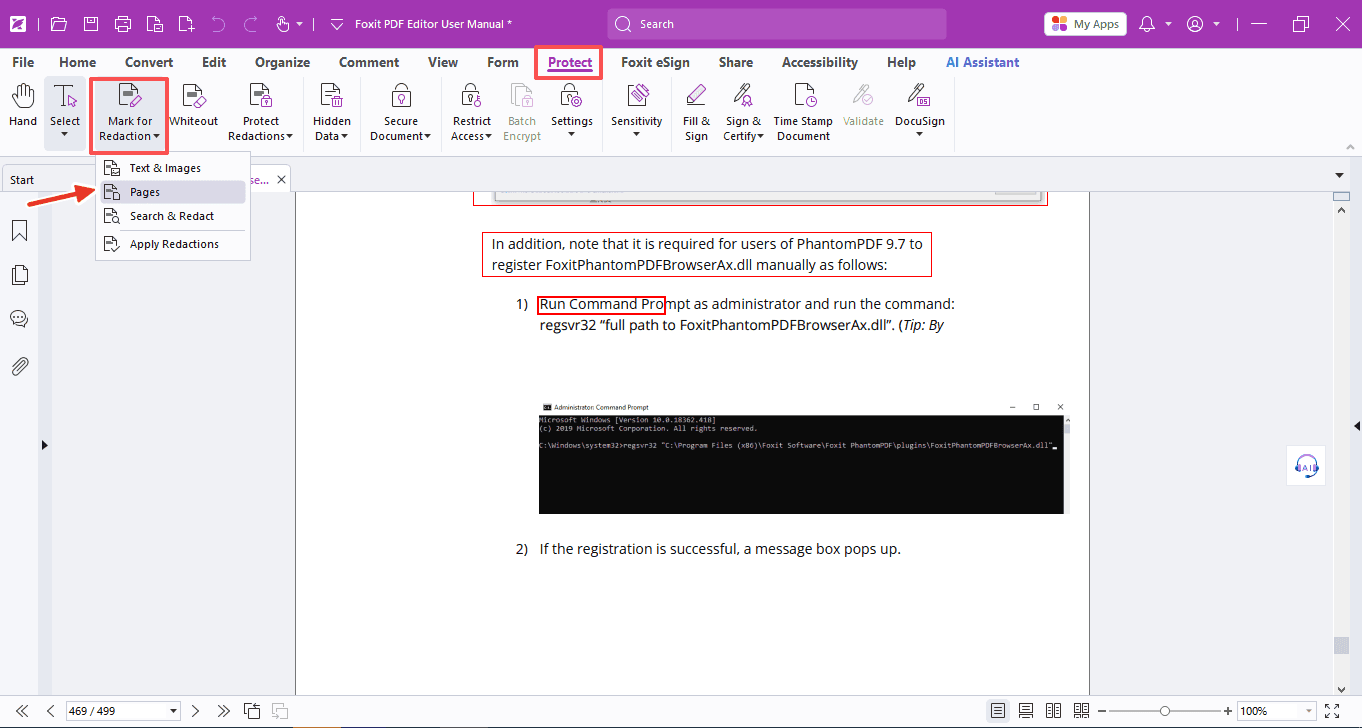
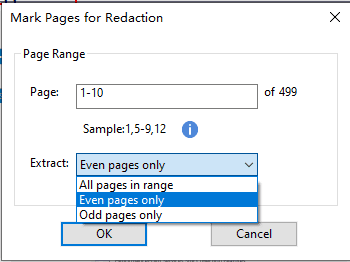
- Choose the page range. In the Extract dropdown, you can even select only even or odd pages within that range.
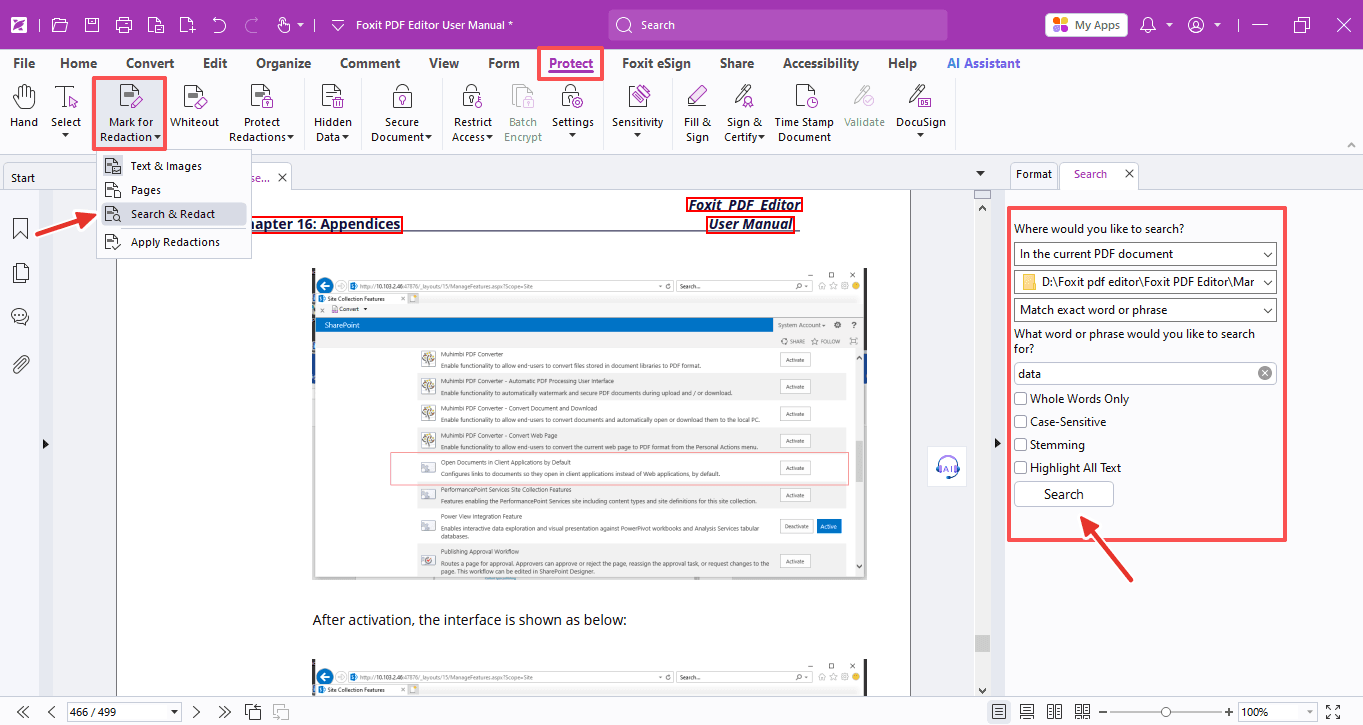
Want to batch-redact a keyword across all open PDFs?
- Click Protect > Mark for Redaction > Search & Redact.
- Choose the document location, type the word you’re searching for, select all results, and mark the entire word for redaction.
Part 2: Set Redaction Properties
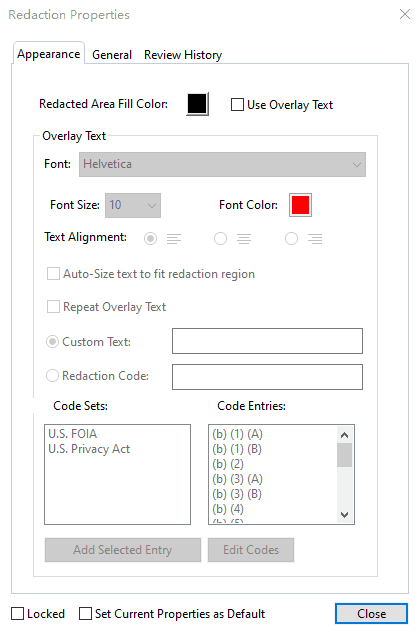
Before applying, you can customize how your redactions look. Right-click a marked area and choose Properties… to open the Redaction Properties dialog.
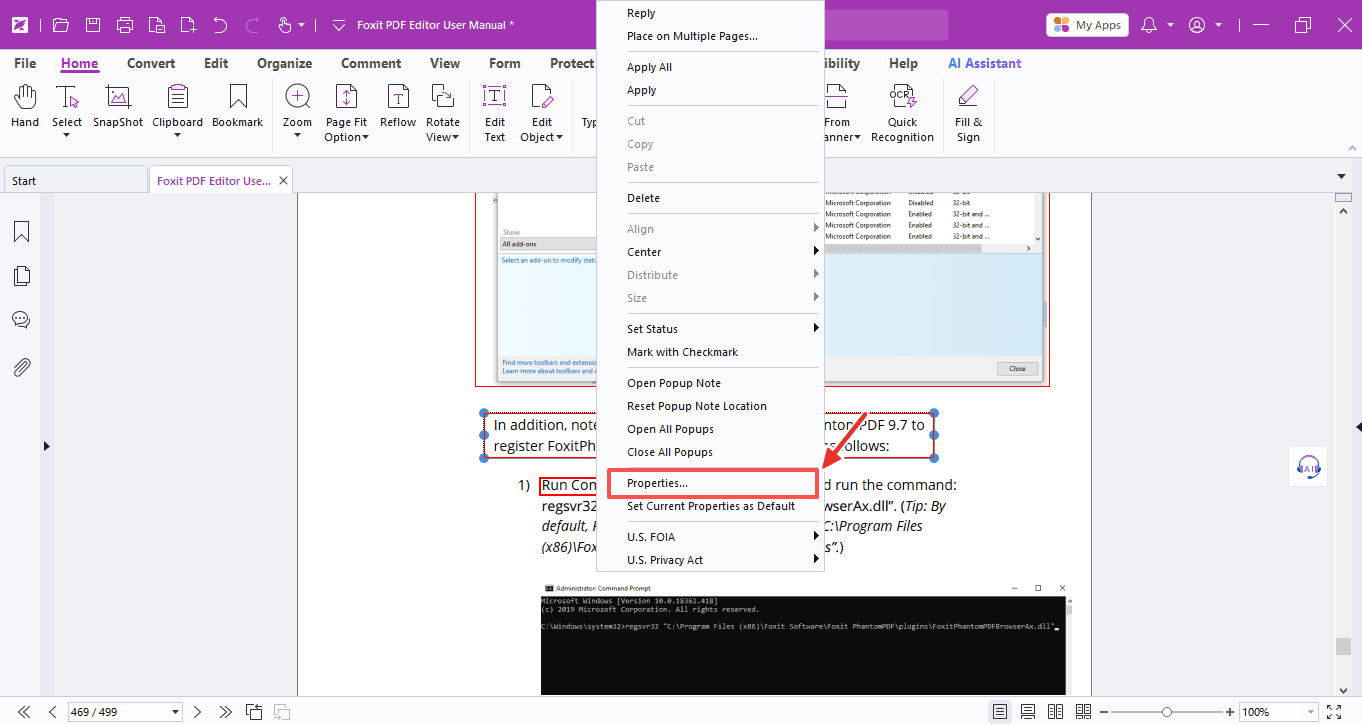
It includes Appearance, General, and Review History tabs. Each tab offers these options:
- Locked — check this to prevent redaction properties from being changed or deleted.
- Set Current Properties as Default — makes your current settings the default for future redactions.
- In the Appearance tab, you can change the fill color of redacted areas, display custom overlay text, or use redaction codes.
Part 3: Apply Redactions
Once you've marked everything, you need to apply the redactions.
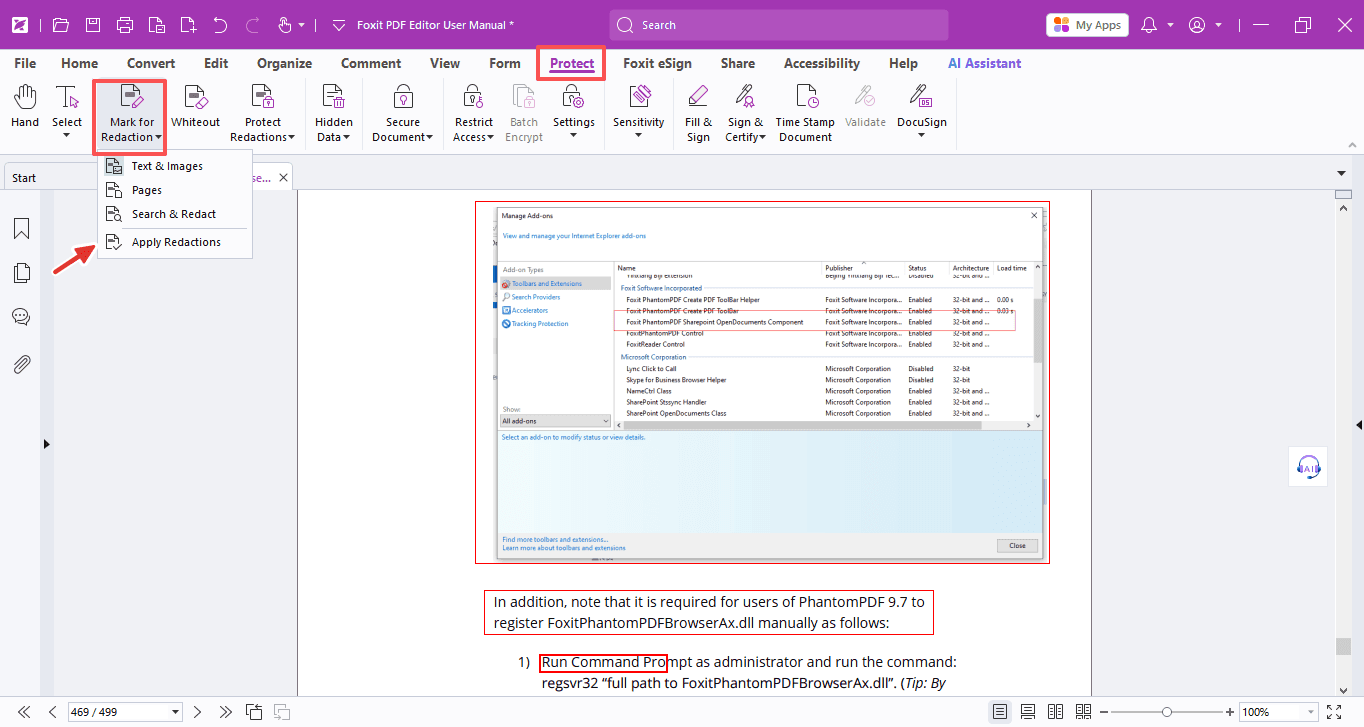
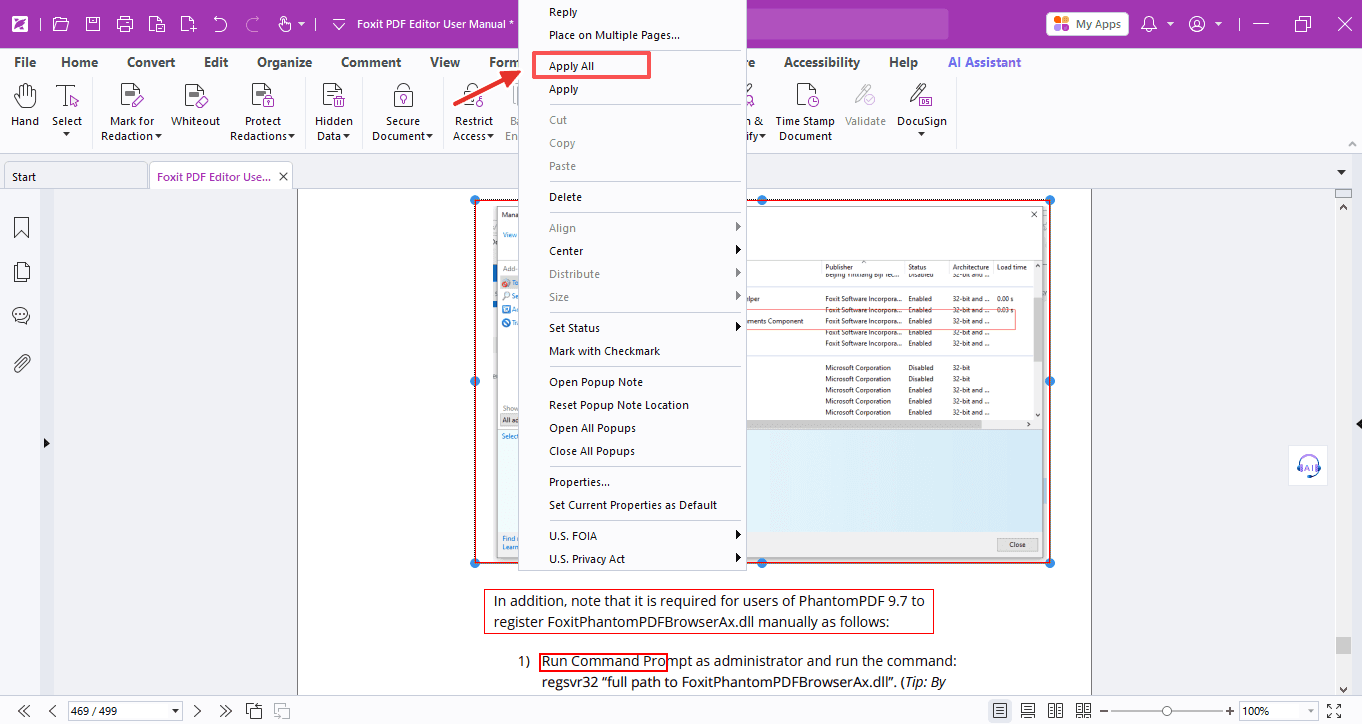
- Select Protect > Mark for Redaction > Apply Redactions, or right-click and choose Apply All to redact everything you've marked.
After applying, you can use Save As to create a new file — that way your original data stays intact if you need it later. (For details, see the 24th weekly tip.)
Additionally, you can also use the Erase feature to permanently delete content and replace it with a white background.
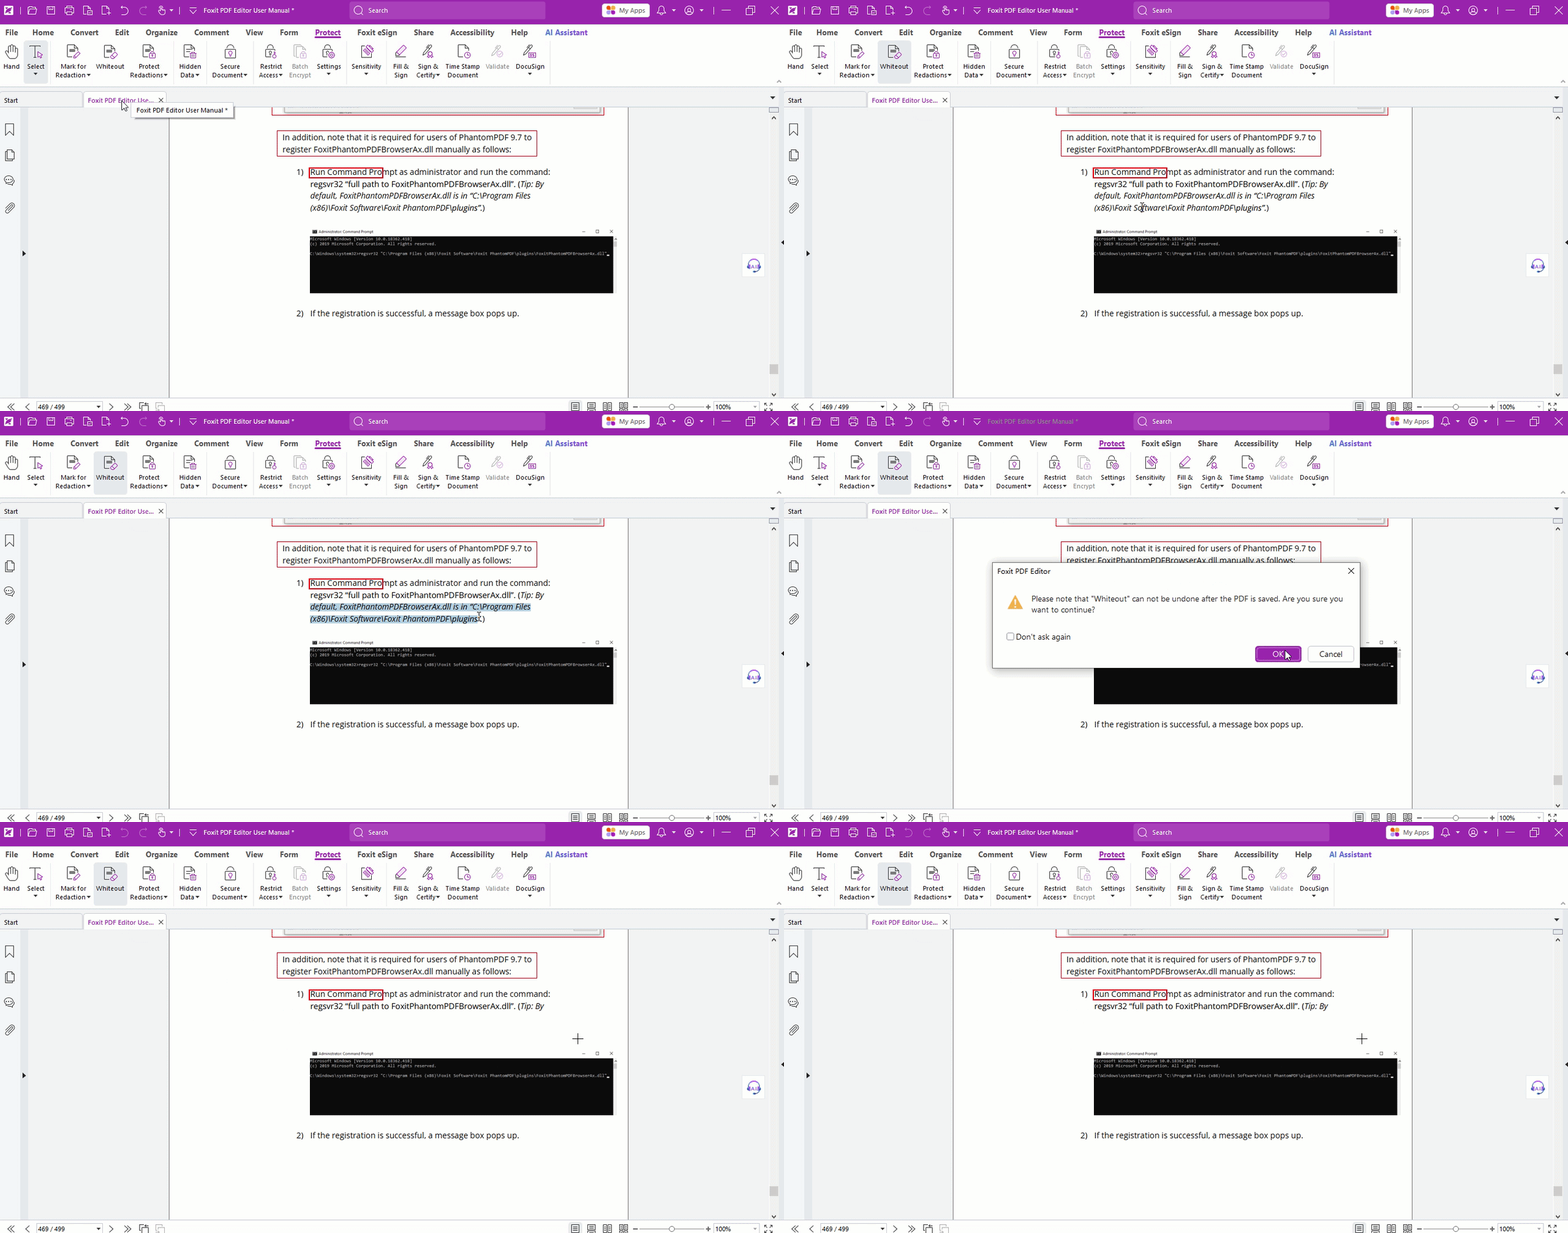
This permanently removes the original data, so save a backup of your original document before you proceed.
That's a wrap for today! Fire up Foxit PDF Editor, redact what needs hiding — done, and safe.
If you need help with any specific case using Foxit PDF Editor, or have questions about how to use it, please feel free to click here to submit your inquiries. We will create dedicated guides based on your actual needs to provide further support.
Try it yourself
Open the interactive Web SDK demo, or talk to a Foxit APAC partner about licensing for your team or campus.