
Weekly Tip #25
How to Add Watermarks to Your PDF
From copyright protection to self-promotion—watermarks do it all. Here's how to add them in Foxit PDF Editor in just a few clicks.
PDF is one of the most common file formats for studying and working — you'll see it everywhere, from business documents and contracts to important notices and design drafts.
Sometimes we need to add watermarks to PDFs—to indicate copyright ownership, protect our content from being copied, or simply promote ourselves a little. So, that's what we're going to cover today: how to add watermarks to PDFs.
Let's get started!
Adding a Watermark
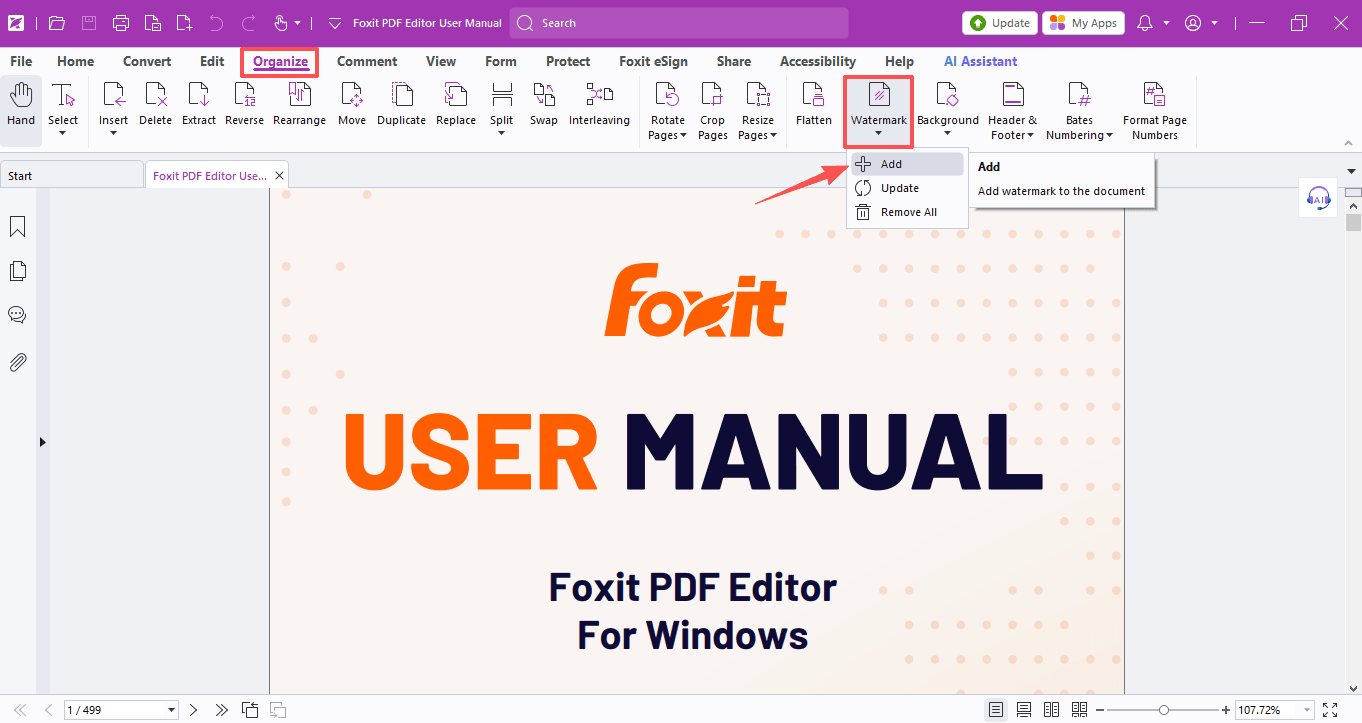
Open a document you want to add a watermark to in Foxit PDF Editor and click Organize > Watermark > Add.
After clicking Add, the Add Watermark dialog box will pop up. As we can see, there are two sources for watermarks:
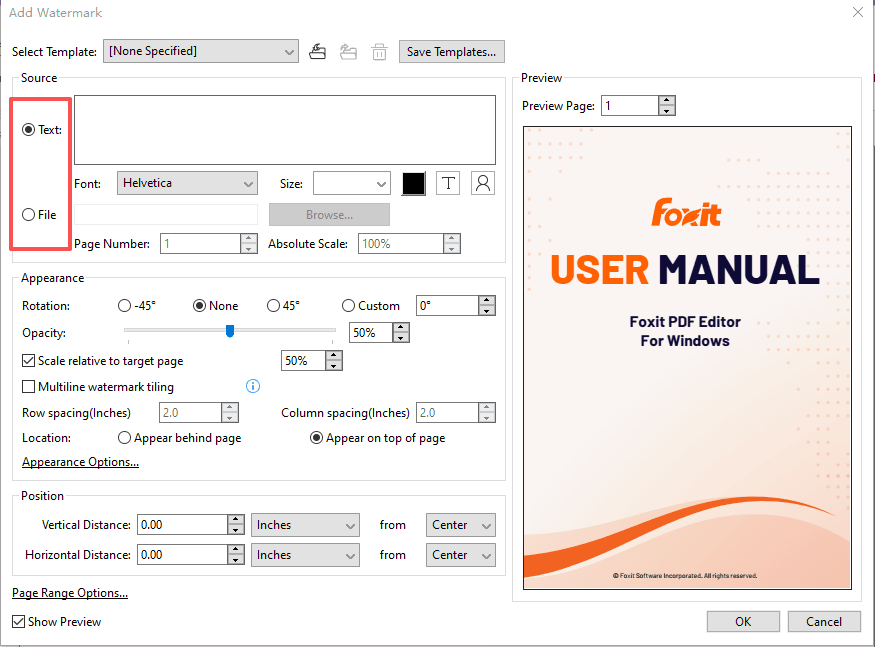
Text Watermark
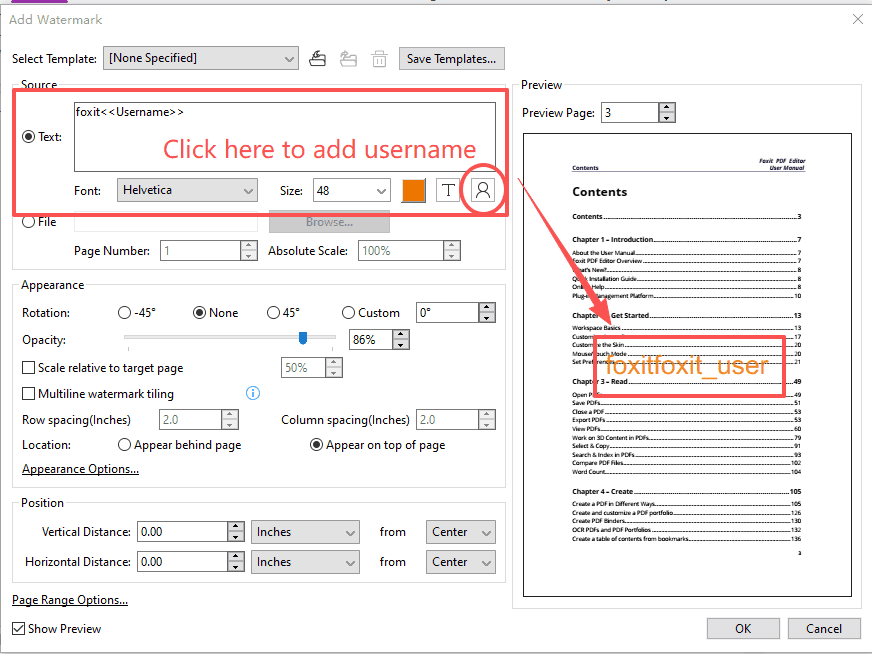
A text watermark means turning the text you enter into a watermark:
- Enter the text directly, or click the small icon "Add username" below the text box to add the current system account name as the watermark.
- Choose the font, size, and color of the text watermark.
- Preview the watermark on the right and make adjustments.
File Watermark
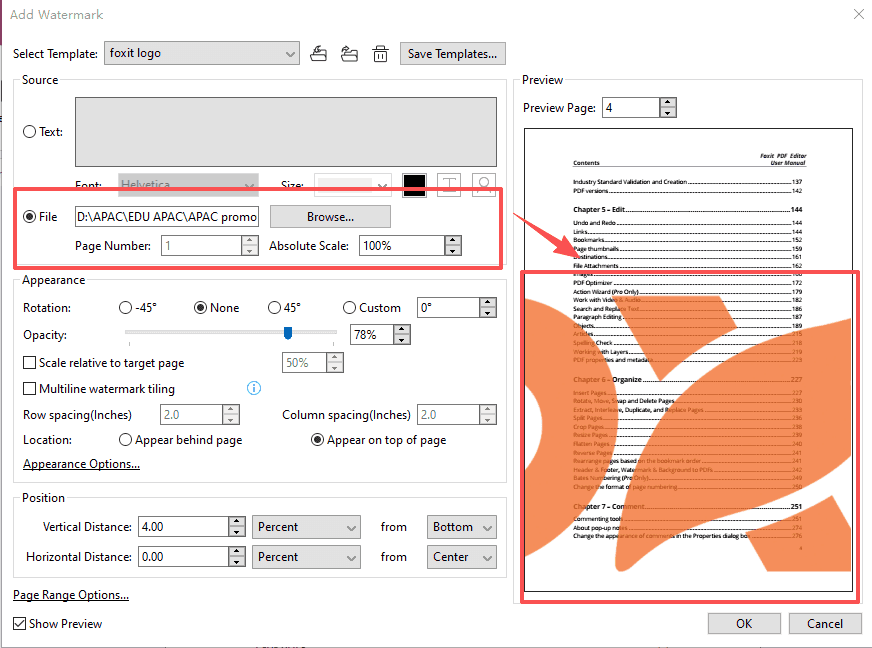
A file watermark supports using image files as watermarks, which is also fairly common. We can use a company logo or our own signature as a watermark.
- Click the Browse button and choose an image file from your computer as the watermark. You can also select a PDF file and use a page from it as the watermark.
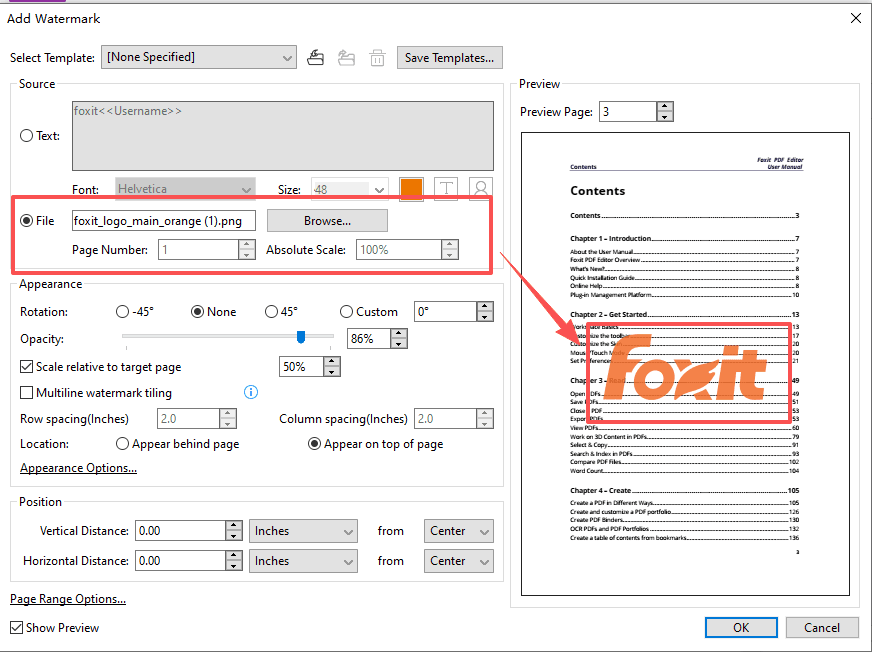
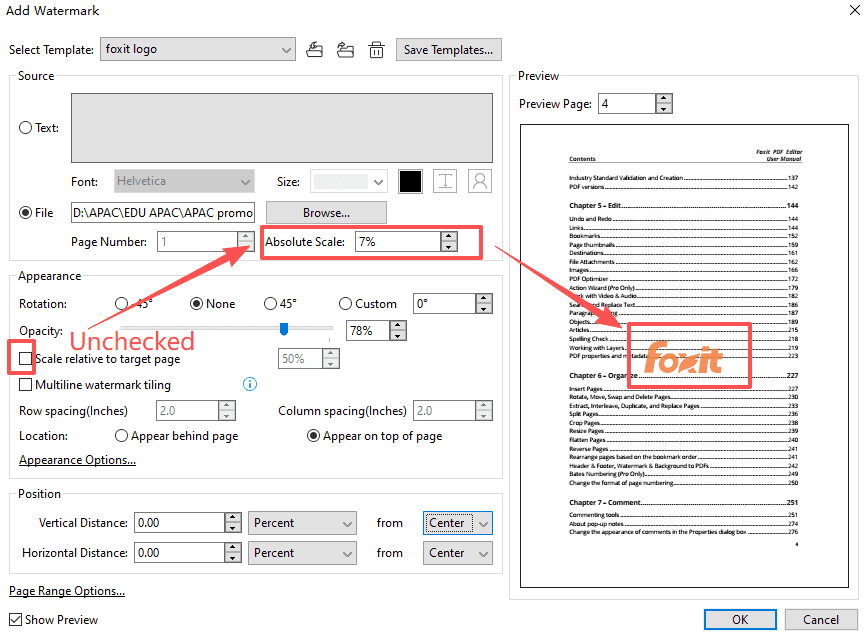
Sometimes the watermark image we choose is too large, so the full watermark isn't visible. In that case, we can adjust its size using Absolute Scale.
Note: The Absolute Scale option is only available when the Scale relative to target page option is not checked in the Appearance part.
Watermark Appearance Settings
Whether it's a text watermark or a file watermark, we can customize the watermark's appearance. For example, the watermark's rotation, opacity, whether it is tiled, and more.
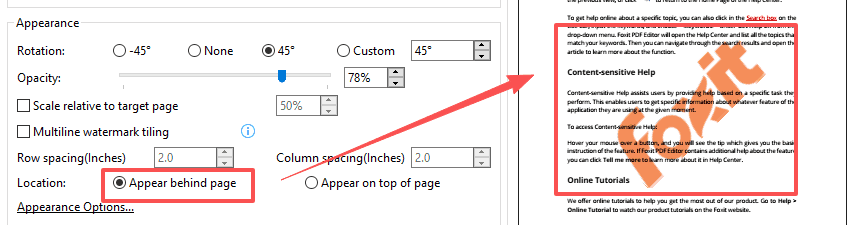
In addition, if you choose "Appear behind page," the watermark will not cover the text.
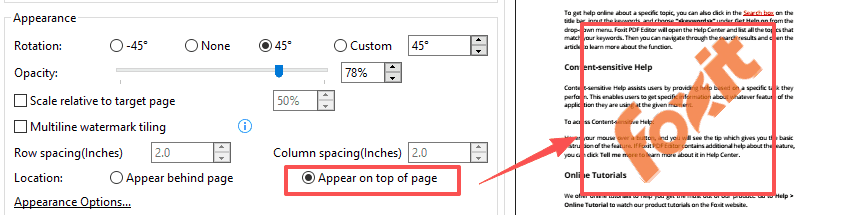
If you choose "Appear on top of page," the watermark will cover part of the page content, but you can adjust it by setting the watermark's opacity.
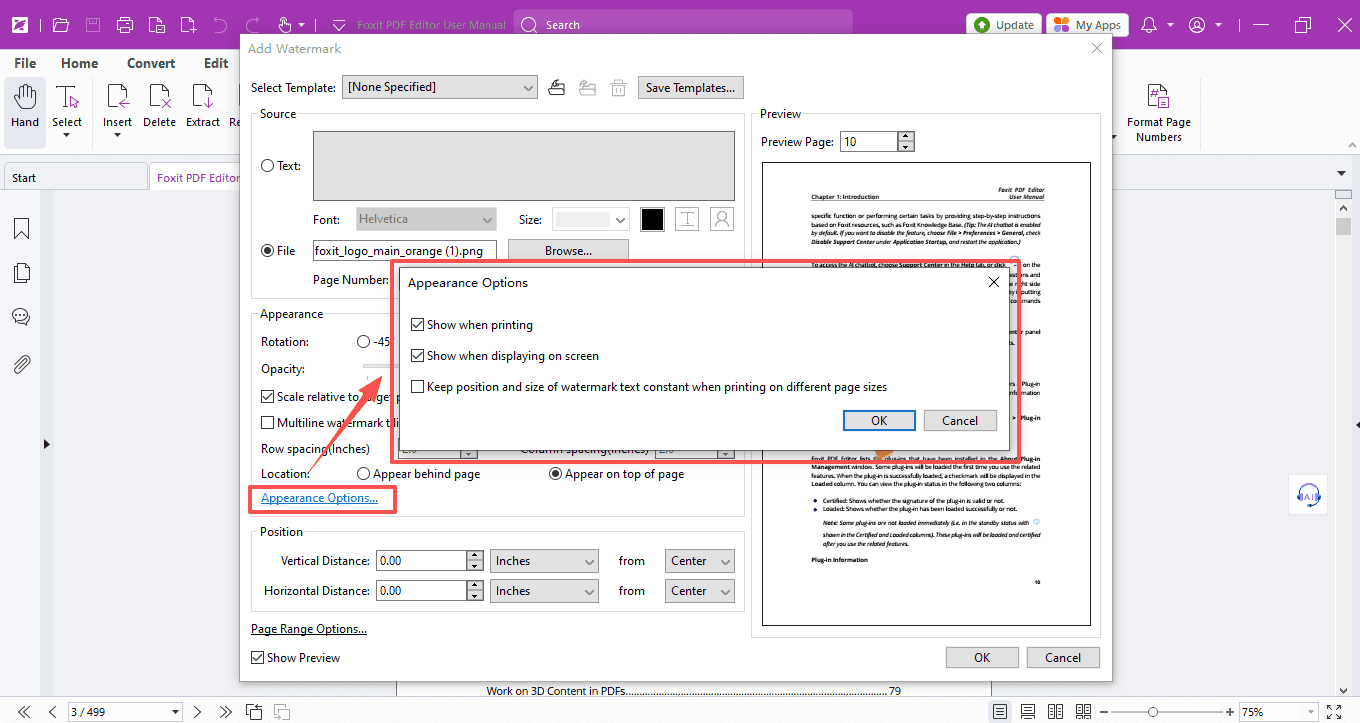
We can also configure this in Appearance Options.
Adjusting Watermark Position
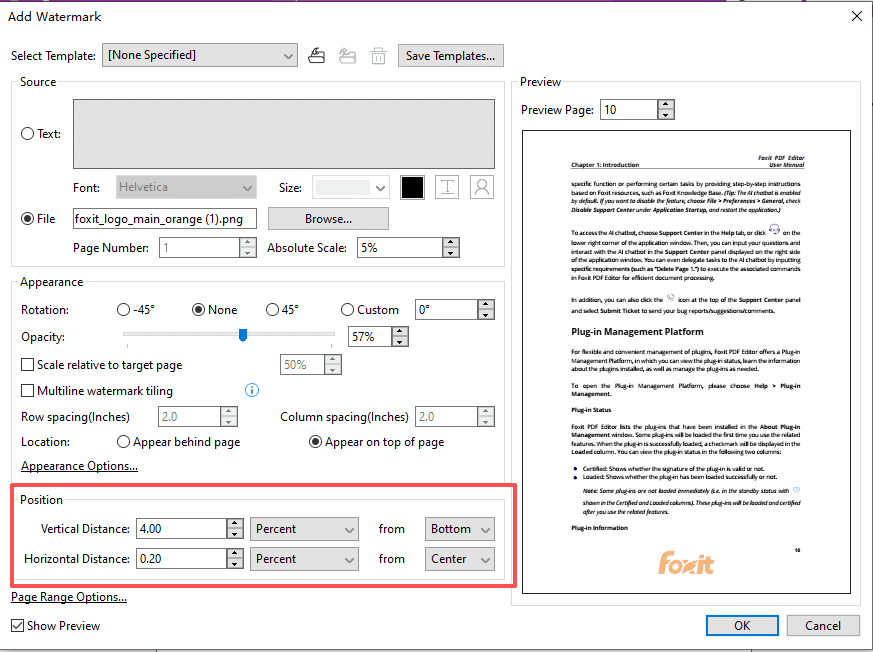
Sometimes we don't need a tiled watermark and just want to place it in one spot.
We can uncheck Multiline watermark tiling and manually adjust the watermark position in the Position section.
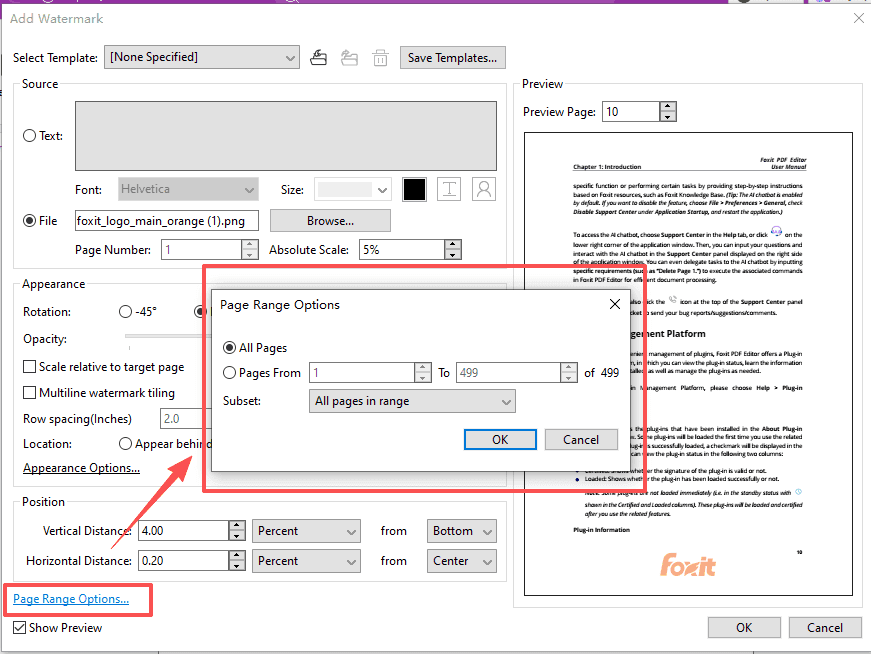
You can also choose the page range to which the watermark is added. It can be added to all pages or only a customized range. This saves a lot of tedious manual work while also keeping the watermark consistent.
Creating a Watermark Template
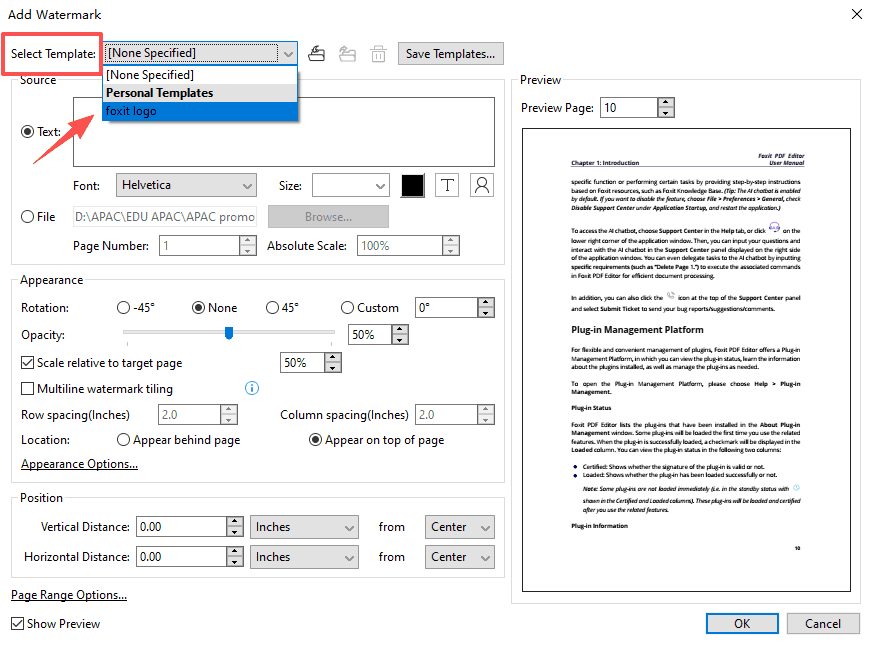
You can save a watermark as a template and apply it with one click:
- Click Save Templates… button at the top of the dialog box.
- Enter a file name and save the current watermark settings.
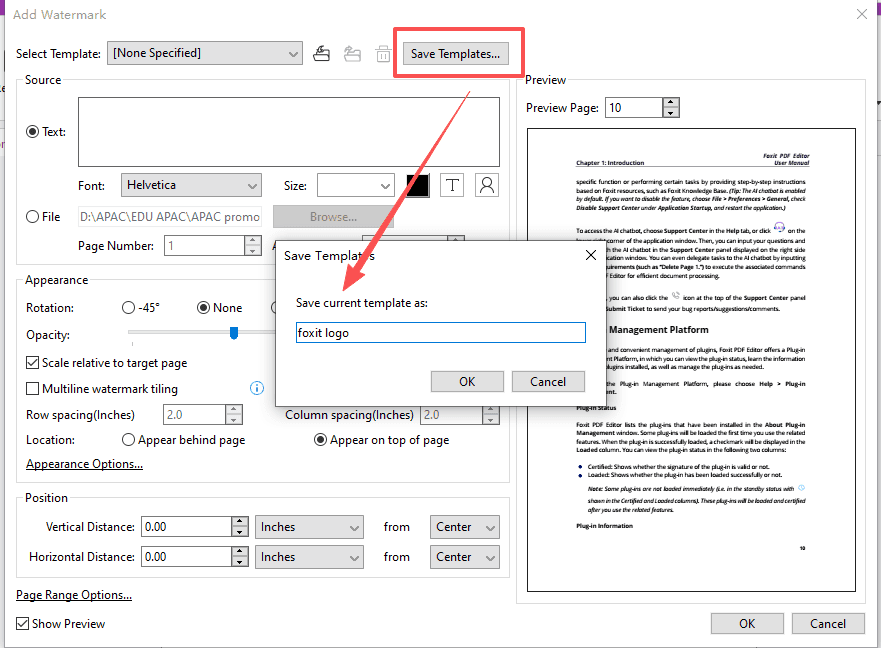
Next time, you can select this template from the Select Template menu to reuse the watermark.
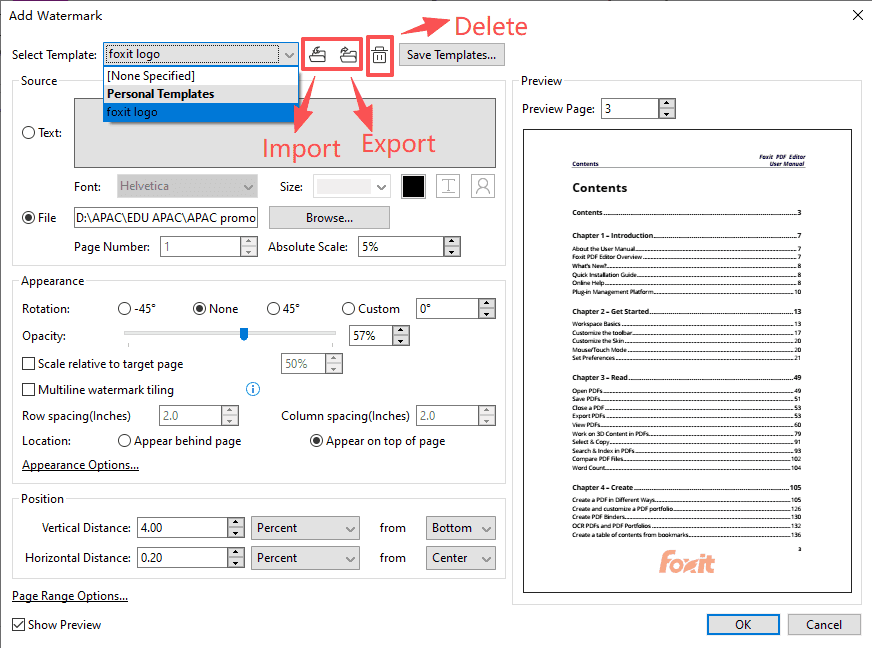
If you want to delete a saved watermark, select it from the Select Template menu, then click the Delete icon. You can also click the Import and Export icon to import or export watermark templates.
After everything is set, click OK to apply the watermark settings.
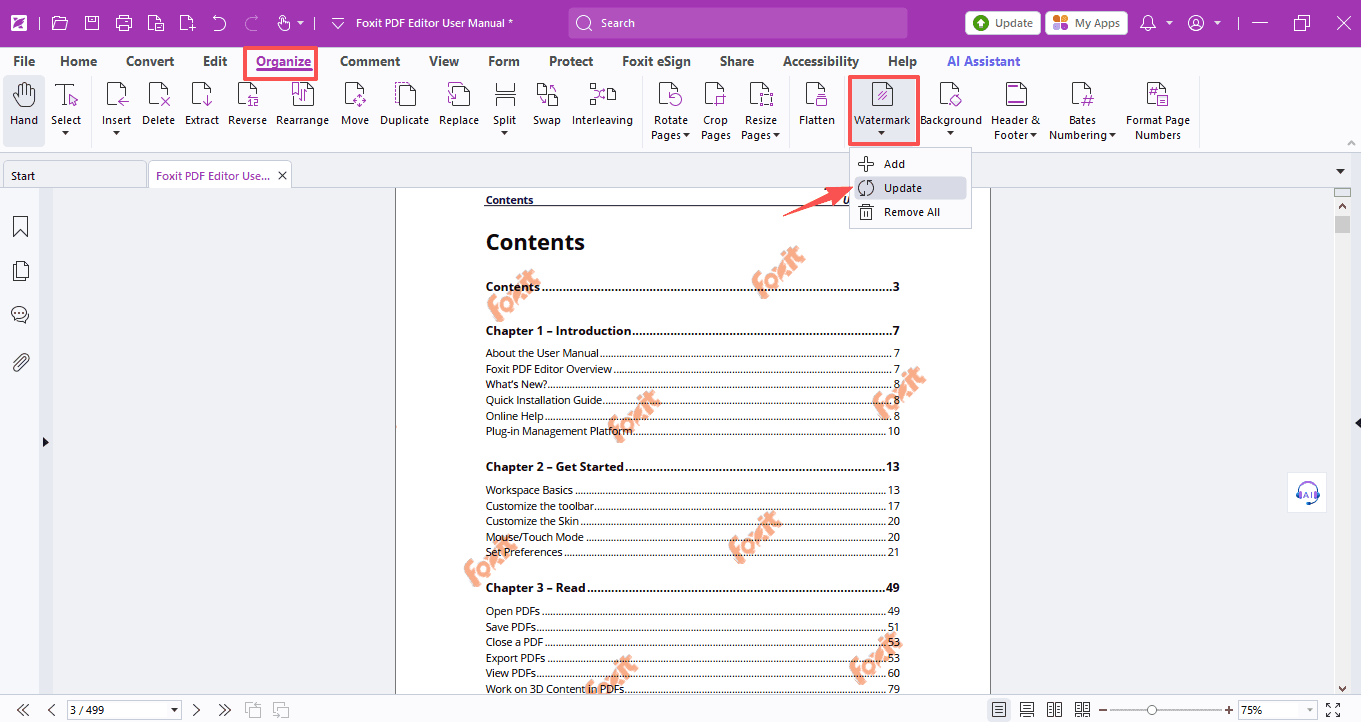
Updating a Watermark and Removing a Watermark
To update the watermark:
- Click Organize > Watermark > Update to set a new watermark.
- Hit OK to update it.
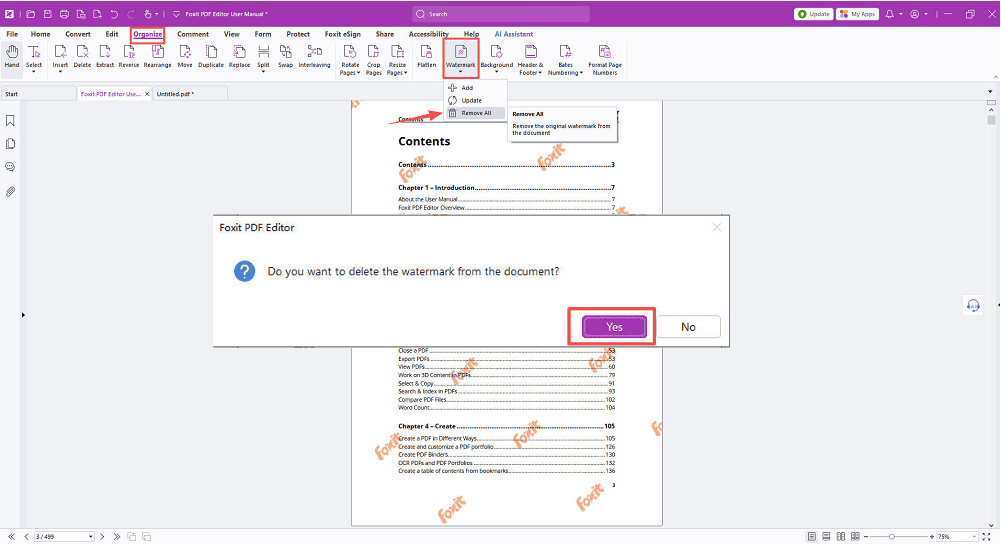
To delete the current document's watermark:
- Choose Organize > Watermark > Remove All.
- Click OK in the confirmation prompt.
Alright, that's everything for today. Go ahead and try it out!
If you need help with any specific case using Foxit PDF Editor, or have questions about how to use it, please feel free to click here to submit your inquiries. We will create dedicated guides based on your actual needs to provide further support.
Try it yourself
Open the interactive Web SDK demo, or talk to a Foxit APAC partner about licensing for your team or campus.